Deploying Microsoft Sentinel in Azure: A Practical Guide to Cloud Security Monitoring
Deploying Microsoft Sentinel from Scratch: Hands-On Lab#
In this lab, I deployed Microsoft Sentinel from scratch in an Azure environment. I configured a workspace, connected key data sources, created analytics rules, and tested them with a simulated attack. The goal was to understand the full lifecycle of monitoring, detecting, and responding to security events in the cloud.
Key Concepts#
| Term | What it is | Why it matters |
|---|---|---|
| Workspace | A Log Analytics space in Azure where data is stored | All Sentinel data (logs, alerts) lives here |
| Sentinel | Cloud SIEM tool for detecting, investigating, and responding to threats | Central point for security monitoring in Azure |
| Data Connector | A way to bring data from a service (VMs, Azure Activity, Defender, etc.) into Sentinel | Sentinel can only analyse data that’s connected |
| Analytics Rule | Logic that searches data for suspicious activity | Creates alerts or incidents automatically |
| Automation Rule | Steps that run automatically when an incident triggers | Saves time and ensures consistent response |
| Workbook | A dashboard to visualise logs and alerts | Helps teams understand activity at a glance |
| Data Collection Rule (DCR) | Defines what data is collected from specific resources | Ensures important security logs are captured |
| NRT Query Rule | Near real-time detection of threats | Speeds up alerting for urgent security issues |
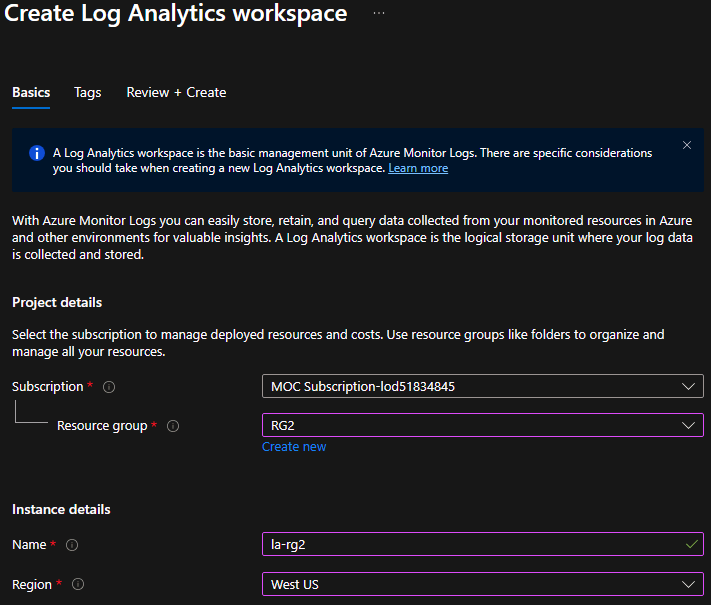
1. Create a Log Analytics Workspace#
- In the Azure Portal, search for Log Analytics workspaces and click Create.
- Fill in the details:
- Subscription
- Resource Group
- Name
- Region
- Click Review + Create, then Create after validation.
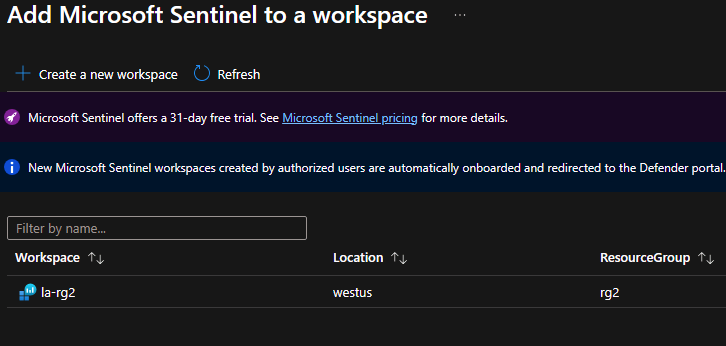
2. Deploy Microsoft Sentinel#
- Search for Microsoft Sentinel in the portal.
- Click Create, select your workspace, then Add.
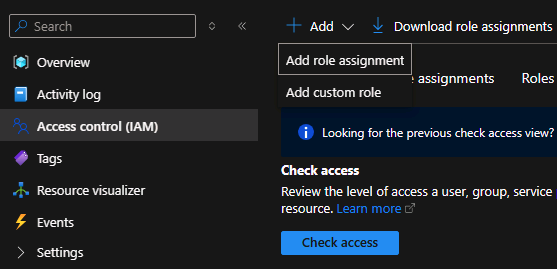
3. Assign a Sentinel Role to a User#
Navigate to the resource group → Access Control (IAM) → Add role assignment.
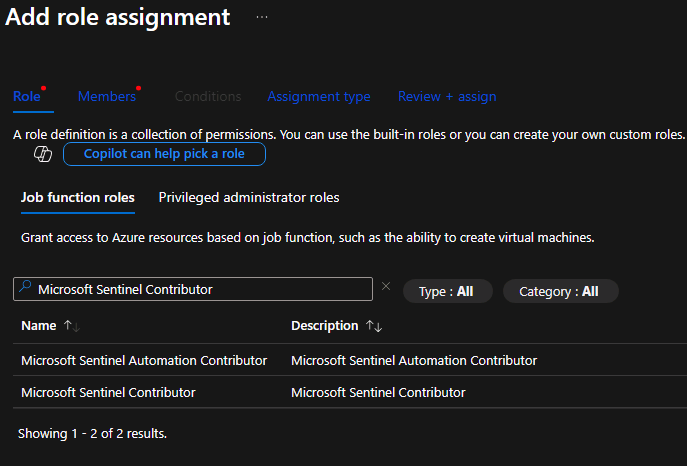
Search for Microsoft Sentinel Contributor and select it.
Assign to a user (e.g., Operator1) → Review + Assign.
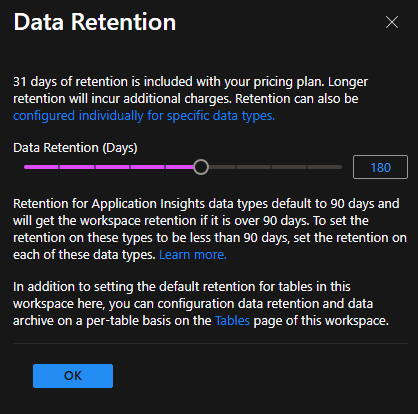
4. Configure Data Retention#
- Go to the Log Analytics workspace → Settings → Usage and estimated costs → Data Retention.
- Change the retention from 30 days to 180 days → OK.
5. Deploy Content Hub Solutions#
- Go to Sentinel → Content Management → Content Hub.
- Search and Install:
- Windows Security Events
- Azure Activity
- Microsoft Defender for Cloud
6. Configure Data Connectors#
Azure Activity#
- In Content Hub → Azure Activity → Manage → Open connector page.
- Launch Azure Policy Assignment Wizard.
- Enter subscription and version; select your workspace.
- Tick Create remediation task, leave default policy → Review + Create → Create.
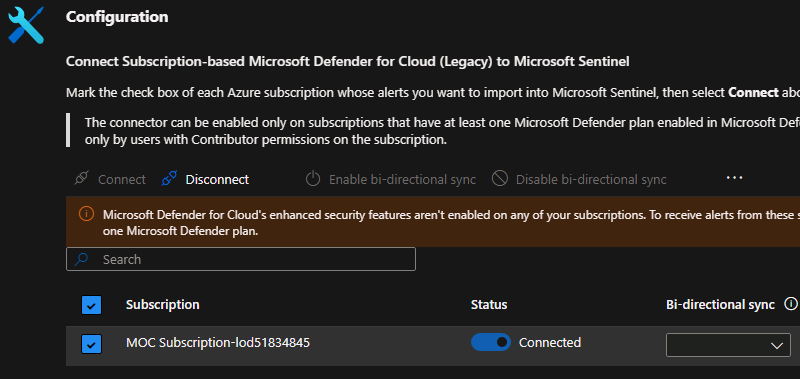
Microsoft Defender for Cloud#
- Open the connector page → Toggle Connected → Ensure Bi-directional sync is enabled.
7. Create Analytics Rules#
Scheduled Rule#
- Sentinel → Configuration → Analytics → Rule templates.
- Search: Suspicious number of resource creation or deployment activities.
- Create rule, set Query scheduling to run every 1 hour → Review + Create → Save.
NRT Query Rule#
- Configuration → Analytics → Create → NRT query rule.
- Name it, select Privilege escalation MITRE ATT&CK tactic.
- Enter KQL query:
// Example KQL
SecurityEvent
| where EventID == 4672
| summarize count() by Account, bin(TimeGenerated, 1h)
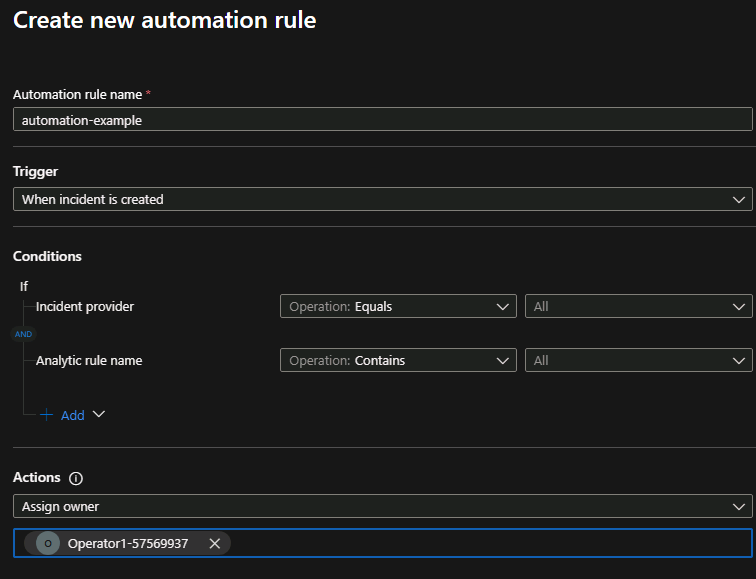
Configure Automation#
Sentinel → Configuration → Automation → Create. Pick Assign owner, select Operator1 → Apply.
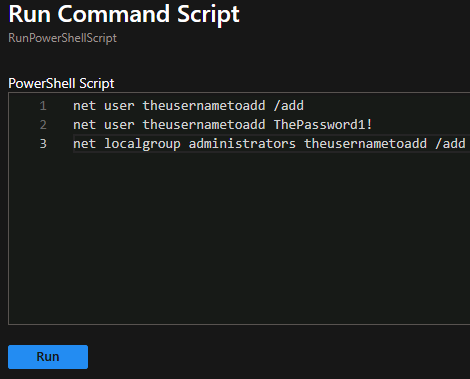
Simulate Privilege Escalation#
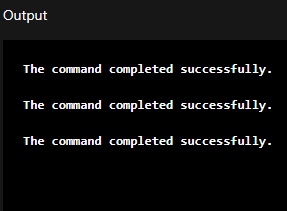
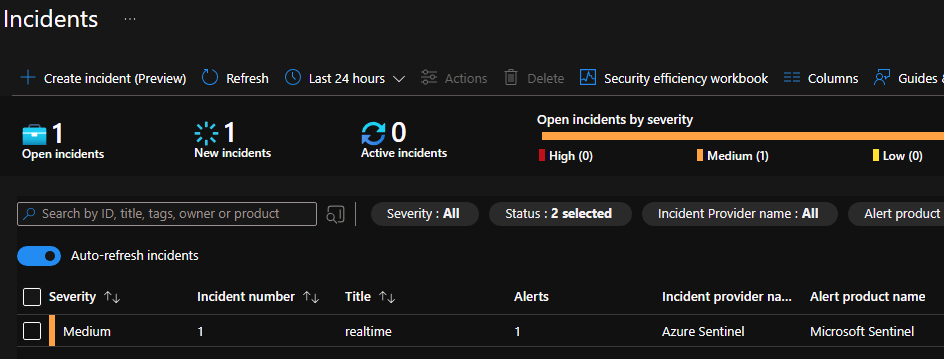
VM1 → Operations → Run command → RunPowerShellScript. Enter test script simulating privilege escalation. Verify incident is created in Sentinel → Open incident → View details.
Reflection#
-How to deploy Sentinel end-to-end in Azure.
-How data flows from source → log analytics → alerts → incidents.
-How to create analytics rules (scheduled + near real-time).
-How to automate responses with automation rules.
-How to validate detections with simulated attacks.